Restoration diary / 03-01-2005
03-01-2005 >> Took a vacation, destroyed a rear door, finished the other one, got new parts for the exhaust and welded them together.
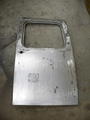
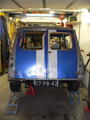
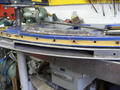 | p1010812.jpg (800 x 600) 03-01-2005 - The left rear door had a rusty part on the left side. On this photo I removed the rusty part, the blue/yellow door on top is the donor for the new part. |
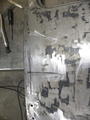 | p1010821.jpg (600 x 800) 03-01-2005 - Welding the donor parts into the side of the door created a big bump on the outside of the door. Trying to undo the bump I made a few scars with the grinder... |
 | p1010822.jpg (600 x 800) 03-01-2005 - ...but that didn't help, until I realized I had destroyed the door. That was a good moment to bring in the hammer and hit the door a few times on the outside. To relieve the stress in my inner self. |
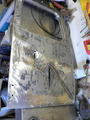
 | p1010823.jpg (600 x 800) 03-01-2005 - As a solution for the violence on the previous photo, I got new door-skins for both rear doors. Here you see the new skin for the left one. Unfortunately, again welding created bumps. But this time I hope to be able to repair them by using other methods. More on this later (I hope). |
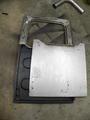
 | p1010824.jpg (600 x 800) 03-01-2005 - The right side rear door, beautifully repaired (if I may say so). |
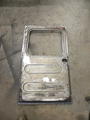 | p1010825.jpg (600 x 800) 03-01-2005 - The inside of the right rear door. |
 | p1010827.jpg (600 x 800) 03-01-2005 - Parts for the exhaust. New parts are from EPS. From left bottom to upper right: End piece with some damping material in it (80mm outside, 2" inside), 13" round damper, 2 90 degree bends and two flanges for connecting the LCB and the link-pipe. Used parts on this picture are the Play-Mini damper, Play-Mini link-pipe and Maniflow LCB. The link-pipe has to be shorted quite a bit, but that can only be done with the engine + LCB installed in the Van. |
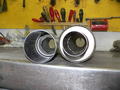 | p1010834.jpg (800 x 600) 03-01-2005 - A peek inside the new damper and end piece. End piece is on the left and seen from the back. |
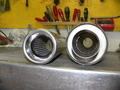 | p1010836.jpg (800 x 600) 03-01-2005 - Another peek, this time the end piece from the front/visible end. |
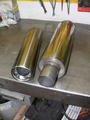 | p1010838.jpg (600 x 800) 03-01-2005 - Both pieces again, from above (beautiful, aren't they?). |
 | p1010840.jpg (800 x 600) 03-01-2005 - Comparing the old Play-Mini end piece with the new one. |
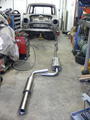
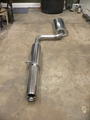 | p1010842.jpg (600 x 800) 03-01-2005 - Exhaust, excluding link-pipe, welded together. |
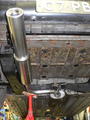 | p1010844.jpg (600 x 800) 03-01-2005 - Exhaust trial fitted under the Van, hanging in rubbers in two places. |
 | p1010846.jpg (600 x 800) 03-01-2005 - Exhaust seen from the back. |
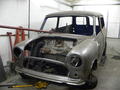 | p1010848.jpg (800 x 600) 03-01-2005 - Nothing special to see here, but I noticed I don't do many 'overall' photo's. So here you go... |
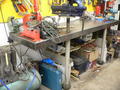 | p1010849.jpg (800 x 600) 03-01-2005 - To keep noise down for my neighbors I placed the workbench on rubbers. On the floor I used the Mini rubber balls, as used in the suspension, and on the wall I used Mini engine mounts. |