Restoration diary / 13-03-2005
13-03-2005 >> New top for the fuel tank, (pre) welded everything together, including filler arm.
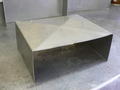
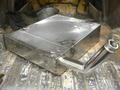
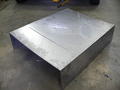 | p1020253.jpg (800 x 600) 13-03-2005 - Made a new top for the fuel tank (with the help of Mark) to replace the previous one. Added two grooves for strength. |
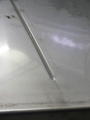 | p1020254.jpg (600 x 800) 13-03-2005 - Close-up of the groove. |
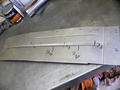 | p1020255.jpg (800 x 600) 13-03-2005 - Test material. First tried a big groove, but this was too much, it affected the form of the sheet metal a lot. Next to the big groove a test run of the smaller version. |
 | p1020257.jpg (800 x 600) 13-03-2005 - Test run on a bended piece of sheet metal. Made a tiny error while making the groove, that's why the test piece is curved. |
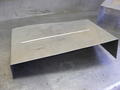
 | p1020258.jpg (800 x 600) 13-03-2005 - Another way to strengthen the top. This works better, this test piece is very strong, but the non-bended sides curved up. This would make welding harder. |
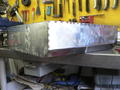
 | p1020259.jpg (800 x 600) 13-03-2005 - New top tag-welded with the MIG welder. Final welding will be done with a TIG welder. |
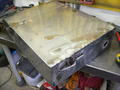
 | p1020261.jpg (800 x 600) 13-03-2005 - Another view. Everything fits nicely. Visible on the left is where I added spot welds to weld the side to the inner structure. |
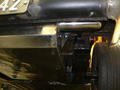
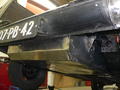 | p1020262.jpg (800 x 600) 13-03-2005 - First time the fuel tank hangs under the Van. Mounts are tag-welded in place. |
 | p1020265.jpg (800 x 600) 13-03-2005 - Mounts fully welded in place. One on the left side, one on the right side and two on the front. |
 | p1020266.jpg (800 x 600) 13-03-2005 - All mounts fully welded, I keep changing my MIG welder from stainless to normal steel and back... |
 | p1020268.jpg (600 x 800) 13-03-2005 - Left side mount. |
 | p1020269.jpg (800 x 600) 13-03-2005 - Cut the tank filler to the right size, welded it in place and added the 'mouth'. This took the whole Sunday, I think I've mounted/unmounted the tank about 20 times in a row to get everything to fit. And I think I succeeded! :-) |
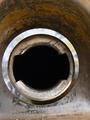
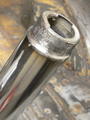 | p1020271.jpg (600 x 800) 13-03-2005 - Close-up of the tank filler mouth. The end is normal steel, I'm not sure how I'll protect it from rust. It used to be protected by solder. |
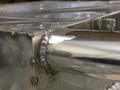 | p1020274.jpg (800 x 600) 13-03-2005 - Close-up of the filler-to-tank welding. The top of the filler lines up nicely with the top of the tank. |
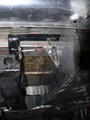
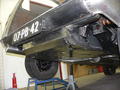
 | p1020277.jpg (800 x 600) 13-03-2005 - Tank and filler in place as seen from under the car, looking rearwards. |
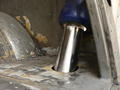 | p1020278.jpg (800 x 600) 13-03-2005 - Filler coming the the floor. Both holes will be filled with a rubber ring. |
 | p1020282.jpg (600 x 800) 13-03-2005 - Filler mouth. |
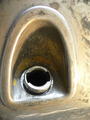
 | p1020285.jpg (600 x 800) 13-03-2005 - This is the biggest accomplishment of the day, the filler is less than 1 mm out of place. The rubber that will fill the gap will push it towards the middle for a perfect fit. |
 | p1020286.jpg (800 x 600) 13-03-2005 - I can't get enough, here's another photo. |
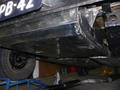
 | p1020289.jpg (800 x 600) 13-03-2005 - And an overview from the underside with the exhaust back in place. |
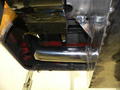
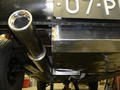 | p1020290.jpg (800 x 600) 13-03-2005 - Mind the space between the tank and the exhaust. Not too much, not too little. Also, the exhaust is a bit lower than the tank. In fact the tank is a (tiny) bit higher from the ground than the car's floor. |