Restoration diary / 23-01-2005
23-01-2005 >> Work on the stainless steel fuel-tank.
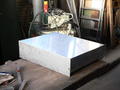
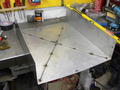
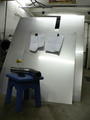 | p1010885.jpg (600 x 800) 23-01-2005 - This is what is to become a 64 liter stainless steel fuel-tank for the Van. Two sketches, three 1mm thick panels (2 square meter in total), the fuel filler and tank sender (in this picture the old one is shown, but I also bought a new one). Missing is the fuel line. |
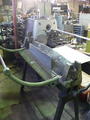 | p1010888.jpg (600 x 800) 23-01-2005 - Bending the first panel (the top of the fuel-tank) 90 degrees. Mark helped me, work was done at Mark's father-in-law's shop. |
 | p1010889.jpg (800 x 600) 23-01-2005 - The bend wasn't 90 degrees over the full length, so I tried to add a few more degrees with a hammer. |
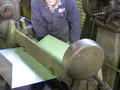 | p1010892.jpg (800 x 600) 23-01-2005 - Action shot: Doing the second bend. |
 | p1010893.jpg (800 x 600) 23-01-2005 - Almost there... |
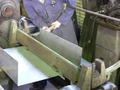
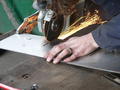 | p1010896.jpg (800 x 600) 23-01-2005 - The fuel-tank will be divided into 9 parts. Here I'm grinding slots into the inner walls. |
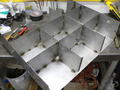
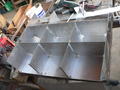 | p1010897.jpg (800 x 600) 23-01-2005 - The 9 compartments, to stop the fuel from moving (too) much while driving. |
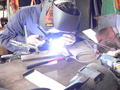 | p1010898.jpg (800 x 600) 23-01-2005 - Test-welding with the TIG welder. Never used one before. Fairly easy to use, if you're welding a flat surface or an outside corner. But welding when the two parts do not touch each other or when you're on the inside of a corner is VERY hard. For the lasts two purposes, you're better off using a MIG welder. |
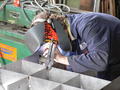 | p1010899.jpg (800 x 600) 23-01-2005 - Welding the inside corners of the compartments. As I mentioned before, a very tough job and a bit frustrating. Some welds turned out fine, the rest were problematic... |
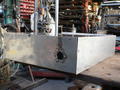
 | p1010900.jpg (800 x 600) 23-01-2005 - At the end of the day, we put the fuel-tank together for a quick shot. Still a lot of work remaining. |
 | p1010901.jpg (800 x 600) 23-01-2005 - The hole for the tank sender. Stainless steel is more prone to warping (due to added heat) than normal steel. After welding around the hole and not thinking about heat distribution, the top was stretched about 2 mm. We tried to remove that by cutting the panel and welding it back together. Overheating the panel again... :-( |
 | p1020001.jpg (800 x 600) 23-01-2005 - At home I used the MIG welder to finish welding the walls for the compartments. Also I put some effort into straightening the warped panels. |
 | p1020003.jpg (600 x 800) 23-01-2005 - Tank sender mounted and seen from the inside. |
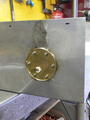 | p1020004.jpg (600 x 800) 23-01-2005 - Tank sender seen from the outside. |
 | p1020005.jpg (800 x 600) 23-01-2005 - Cross to strengthen the top panel, to keep it from vibrating while driving. |
 | p1020007.jpg (800 x 600) 23-01-2005 - Compartments welded into place. The tank is fairly stiff right now. |
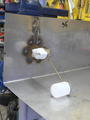
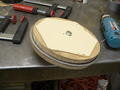
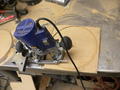 | p1020008.jpg (800 x 600) 23-01-2005 - Welding sheet-metal often causes the material to 'grow' (from heat). There are a few ways to let metal shrink again, a shrinking disk is one of them. On the Metal-Meet form is (besides lots of useful info on metal-shaping) an instruction how to make a shrinking disk, here I'm trying to make mine. First I make two rounds out of MDF. |
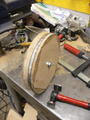
 | p1020009.jpg (800 x 600) 23-01-2005 - Drill 10 mm holes in the MDF and hold them together with a piece of 1mm stainless steel in between. |
 | p1020010.jpg (800 x 600) 23-01-2005 - 10 mm drill the stainless through the MDF hole and put a big bolt in to keep things together. |
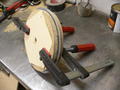
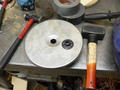
 | p1020011.jpg (600 x 800) 23-01-2005 - With a steel hammer, bend the outer edge 90 degrees, for strength and safety. |
 | p1020012.jpg (800 x 600) 23-01-2005 - With a big hammer, made a dimple for fitting the disk. |
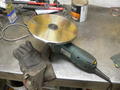 | p1020013.jpg (800 x 600) 23-01-2005 - Here it is. Don't know yet if/how it'll work, but I'll report about it later on. When using the disk, wear gloves!!! (reminder to self) |