Restoration diary / 03-04-2005
03-04-2005 >> TIG welded fuel tank, pressure tested and a bit of cleaning up.
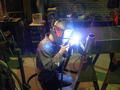
 | p1020301_rimg0510.jpg (800 x 600) 03-04-2005 - Before, I tag welded the fuel tank. Here we (Mark and me) are at Mark's father in law's shop TIG welding the tank. While I was welding, Mark made some pretty photo's. |
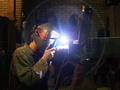
 | p1020301_rimg0512.jpg (800 x 600) 03-04-2005 - Pretty photo nr. 2. |
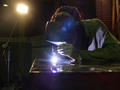
 | p1020301_rimg0513.jpg (800 x 600) 03-04-2005 - Pretty photo nr. 3. |
 | p1020301_rimg0522.jpg (800 x 600) 03-04-2005 - Pretty photo nr. 4. |
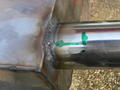
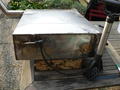 | p1020309.jpg (800 x 600) 03-04-2005 - Pressure testing the fuel tank. I put a bicycle air nozzle in the fuel line and put tape on the filler pipe. This way I found 5 leaks. In this photo two on the right (look for the green arrows) and one where the fuel line enters the tank. |
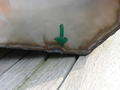
 | p1020310.jpg (800 x 600) 03-04-2005 - Tiny leak near the filler pipe. |
 | p1020311.jpg (800 x 600) 03-04-2005 - Another tiny leak at the bottom. |
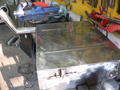 | p1020322.jpg (800 x 600) 03-04-2005 - Welded the 5 leaks (will test it again later this week), cleaned up the outside with the sander and polished the top. The top isn't 100% smooth, but I don't think I care. Once the tank is mounted, you'll never see the top again... |