Restoration diary / 06-02-2005
06-02-2005 >> Various fuel tank-related things.
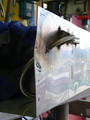 | p1020033.jpg (600 x 800) 06-02-2005 - Welded the fuel line and created a big warp. |
 | p1020036.jpg (800 x 600) 06-02-2005 - Removed the warp from the previous photo by shrinking with the disk. |
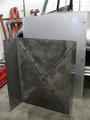
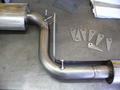 | p1020037.jpg (800 x 600) 06-02-2005 - Made a heat shield for the exhaust. The exhaust will be fairly close to the fuel tank and I don't the fuel to heat up too much. |
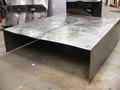 | p1020039.jpg (800 x 600) 06-02-2005 - The top of the fuel tank. I tried to shrink some warps in here too, but completely fucked up. There's no going back, I must make a new top. |
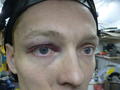 | p1020042.jpg (800 x 600) 06-02-2005 - When I removed the exhaust from under the car, it slipped from my hands and landed on my eyebrow. Strangely that didn't leave a mark on my eyebrow (if you don't count the big egg that grew after the hit), but the next day I had a very red/purple eye-surrounding. |
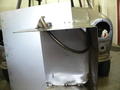
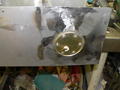 | p1020048.jpg (800 x 600) 06-02-2005 - Where the tank sender is going to be mounted, the metal had warped so much I was afraid it wouldn't be fuel-tight. Here I made a new circle, created the right holes and welded it on the (not visible) inside. This should give a better base to mount on. I hope... |
 | p1020049.jpg (600 x 800) 06-02-2005 - Again the demolished top of the fuel tank. In the back you see the new plate, marked for bending. |
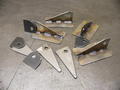 | p1020052.jpg (800 x 600) 06-02-2005 - Various brackets for mounting the fuel tank to the car. The four little ones are from normal 2mm thick steel and will be welded to the underside of the Van. The four large brackets are from stainless steel and will be welded on the fuel tank. |