Restoration diary / 14-11-2004
14-11-2004 >> More work on the front, almost finished... :-)
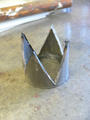 | p1010597.jpg (600 x 800) 14-11-2004 - This crown is made from a tube and will soon become a (different shaped than before) half-egg. |
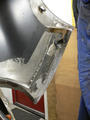
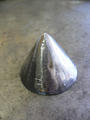 | p1010598.jpg (600 x 800) 14-11-2004 - Half-egg, although it doesn't look like an egg anymore. These will fall over the other two bump stops, near the A-panels. |
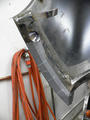
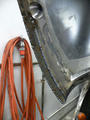
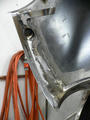
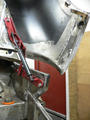
 | p1010600.jpg (600 x 800) 14-11-2004 - Half-egg in position, welded to the side-bracing and the mudguard brace. The, on this photo, left end of the wings need to become a bit more tough (on this photo it's single and double sheet metal which won't survive many weeks of car-abuse). In the following few photo's I'll explain the process. |
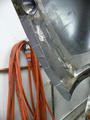
 | p1010602.jpg (600 x 800) 14-11-2004 - Put 'McGuyver' tape over the area that needs to be covered, at least two layers. |
 | p1010603.jpg (600 x 800) 14-11-2004 - With a sharp knife, cut away tape where you won't need metal. |
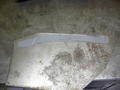 | p1010606.jpg (800 x 600) 14-11-2004 - Carefully pull away the tape and stick it on a piece of metal. Cut away the metal around the tape. |
 | p1010608.jpg (600 x 800) 14-11-2004 - After a bit of post-processing the new piece of metal is finished. Yes, it's hard to take a sharp picture with one hand and 1/8 shutter... :) |
 | p1010609.jpg (600 x 800) 14-11-2004 - Piece of metal spot welded into place. |
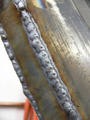 | p1010610.jpg (600 x 800) 14-11-2004 - Close-up of the spot welding. This is a fantastic (and for me pretty new) way of welding sheet metal. The way to do it is use a medium high setting on the welder, weld a spot (a bit over 1 second), wait a second and weld the next spot with 1/3 overlap. Using short bursts takes away the risk of burning holes in the relatively thin sheet metal and while waiting a second for the next weld, the metal has time to heat up (from the previous weld). This heating up makes sure that the next weld will be strong all through the sheet and that you get very flat welds. /me likes |
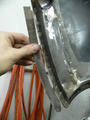
 | p1010611.jpg (600 x 800) 14-11-2004 - The outside of the wing, where I just welded the piece of sheet metal. |
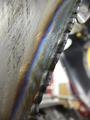
 | p1010612.jpg (600 x 800) 14-11-2004 - This is the result after 15 minutes with the grinder. |
 | p1010613.jpg (600 x 800) 14-11-2004 - The same, on the other side. |
 | p1010614.jpg (600 x 800) 14-11-2004 - Made the definitive holes for the hinges and strengthened the inner wings with square tubes. |
 | p1010615.jpg (600 x 800) 14-11-2004 - Seen from the other side. |
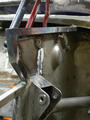
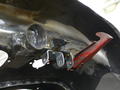 | p1010617.jpg (800 x 600) 14-11-2004 - Made little brackets for the safety bonnet-hooks and a 'resting' point for the rubber hook. |
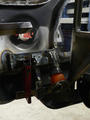 | p1010618.jpg (600 x 800) 14-11-2004 - The safety hook seen with the hood closed. |
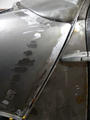 | p1010619.jpg (600 x 800) 14-11-2004 - Outside of the wing. This should do it... |